The Jonestead patio is finished, and guess what?! We did it ourselves!!! I dreamed up our patio design for months before we were actually able to start it. This project took two full weekends, but honestly, I'm pretty impressed that we were able to update our backyard so dramatically in just two weekends.
Here's a little sneak peek at our patio...

Now that you've seen a little sneak peek, you have to see the before. It was such a drastic difference, and this DIY paver patio has turned our backyard into usable space and it's beautiful!!

See, I told you!! The before of our backyard is so sad and we were never out here. I wanted to make the most of our small backyard, and so I had a brilliant idea to design and execute our DIY paver and marble gravel patio with mulch beds & porch swings. The porch swings are one of my favorite additions to our home and I'm so excited for Bentley to be able to grow up with porch swings just like I did as a little girl!
Now, I'll walk you through how we turned our boring, basic backyard into our darling paradise. With a little math, muscles, blood, sweat, and tears, you too, can have a DIY paver patio. Let's get started!
First things first, measure your space and measure again! I used Photoshop to plan out our patio down to the inch to make sure everything would look good, but you can also use stakes and string. I ended up using the stakes and string method to help me mark where I needed to dig out the grass. Once you have your stakes and string in place, use a flat shovel and spade shovel to help edge around where the string is. I'm glad I took the time to create a mark in the grass and dirt with the shovel all the way around because as I started to dig out the grass, the grass was already cut in a clean line, which made it easier to have clean edges in the end. I basically just shoved the shovel down about 2 inches all around the string line.
Below, you can see where I started to edge and remove the grass. I had two sections of stakes and string. The inside string line was to help me see where the pavers and marble gravel were going to stop and the outside line is where the mulch bed stops.
Once all of the grass is dug out, it will look like mine does below. You want to be careful as you are digging out the grass because you don't want to dig out too much dirt. We chose to dig out about two inches, which ended up being the grass, roots, and a little bit of dirt. As labor-intensive as it was to do by hand, it was a day's work, and then it was over. Day 1 of your work will be by far the hardest day.
A lot of other tutorials will tell you to dig out around six inches for paver patios, but because we used the large format concrete pavers, we did not need to do this.
Once the ground was level-ish, I added the black edging material around where the stakes were in both the inside line for the pavers and marble gravel and the outside edging for the edge of the mulch beds. Once these were in place, that was the end of day one for us. It was a long day, but we were so happy with how far we got.
Note: Most trash companies do not allow you to throw the dirt away--even with a special bulk pickup. You will want to either bag up the dirt or load it up in the back of a truck so that you can take it to an organic waste disposal place in your area. We ended up bagging all of the dirt in construction-grade trash bags, loading them in the back of the truck, and taking them to the organic waste disposal place where we dumped the dirt out of the bags there. We had to put our dirt and grass in the bags because we live in a townhome and had to carry the bags through the house to the truck on our driveway. The organic waste disposal only cost us $35.

On day two, we added about ten bags of sand on top of the dirt, packed it with a 10"X10" tamper. This did not make the ground perfectly level just yet, but we knew we would be adding more sand at a later step. Stay tuned for that. After we had the ten bags of sand spread throughout the space where the pavers would be going, we put down the landscaping fabric all along the space. We did this mainly because we kept getting covered in mud, so adding the landscaping fabric helped us stay neat and organized.
One thing I will say is to buy extra landscaping pins! We had to run back out to Lowe's in the middle of our project because we ran out.
In the photo below, you will see another layer of sand was added, and we started to put our pavers in place. We had added another ten bags of sand, and we ended up realizing after the pavers were in place that we were going to need another ten bags of sand to help level the ground.
Once the landscaping fabric was all pinned down, I started to get the plant placement. I wanted to start to envision the space in the mulch beds since I knew we weren't going to get much further with the paver patio that day and we couldn't get more sand that weekend.
I ended up placing the plants on the landscaping fabric, and throughout the week, I came out to do some planting a couple of nights. It really helped to visualize where the plants were going to go by putting them in place, and then leaving them there overnight to make sure I was still going to like the placement the next day! In order to help keep the weeds from growing in the dirt, cut an X or circle in the landscaping fabric, and then dig out your dirt from that area. I tried to remove as little landscaping fabric as possible. I also put a little bit of potting soil in the newly dug hole and around the plant as I put it in the ground so that it could have as many nutrients as possible.
In my garden bed, I planted Boxwoods, Hydrangeas, and a Sky High Pencil Shrub. The Sky High Pencil Shrub did not transplant well into the new soil since our soil is super acidic, so I think I'll just move one of the lantern lights over until I figure out a new plant species that does well in acidic soil!
The pretty purple flowers are actually hanging baskets that I just put into the ground! With our HOA, we have to get approval for any plants that are planted into the ground, so the easiest option for me was to actually not plant the annuals in the ground and simply dig a hole where the pot can sit each season! In the spring and summer, I'll have colorful annuals, and in the fall, I'll have Mums. I love the little pop of color that they will add each season to our garden bed.
Once all of the plants were planted and potting soil was packed around each plant, it was time to finish the garden beds with a nice layer of black mulch. The black mulch will need to be refreshed each year, but it adds the most beautiful contrast to the paver patio.
Okay, fast forward to the next weekend, we are back to the pavers! As the pavers were sitting on the sand, it naturally helped level out the area, but you will definitely need way more sand than you think you will. We ended up taking all of the pavers off and adding an extra ten bags of sand during weekend number two.
After we got all of the sand down and leveled, then we put the pavers down in their final spot, and the ground was level! When you're grading your space, make sure to grade your ground away from your home so that water does not pool up by your foundation or doorway. To help us level the space, we took a random 2x4 that we had in the garage and slid it over the sand to level out the sand. We then took a rake gently to even it out once more and create a "roughed up" layer of sand. This allowed the paver to fully sink and level into the sand and prohibit it from wobbling or be lopsided and uneven. The pavers we used are 75 pounds each, so they definitely helped level out the sand themselves.
As you are placing your pavers on the sand, try not to slide them around. Pick them up and put them carefully in their place as close as you can. We started by placing the paver centered with the door and worked from there measuring from each side 6 inches in every direction for where the next paver would go. We used that same 2X4 we used for leveling the sand to help create a straight line along the pavers to make sure we were placing them straight.
Everything that we did, we pretty much made up as we went, and something I will say is with this project, you have to be patient and take your time. Measuring throughout and really focusing on leveling out the space is super important. You don't want wobbly pavers, and if you don't take the time to properly level the area with enough sand, your patio won't be level.
Once all of our pavers were in place, level, and evenly spaced, it was time for the fun part! We filled in all of the gaps with the marble gravel. We used twenty-two bags of marble gravel, and we will end up getting five to ten more bags in a couple of weeks to add in between the pavers as the gravel and ground naturally settles further.
Around the edges, I was careful to put the gravel in place by hand so that it didn't spill over into the grass or mulch bed. Just by adding that gravel, it turned a sandpit with pavers into a gorgeous European-inspired garden.
To really complete our patio, we added the gorgeous porch swings on either side. I just love, love how our patio turned out, and I can't wait to finish decorating and adding a few more planters around in the open gravel spaces. I'll have a post coming up super soon where I will share more details and up-close photos of our patio decor! Below, you will find the sources of every product we used to create our DIY paver and marble gravel patio!
Shop My Post!
Hydrangea (In-Store at Walmart)
Decor Preview //
Our main patio decor is all from Wayfair, and I am so thankful to be partnering with them for our final patio reveal coming soon!
Here are preview links to the decor we have:
Stay tuned for the final reveal!


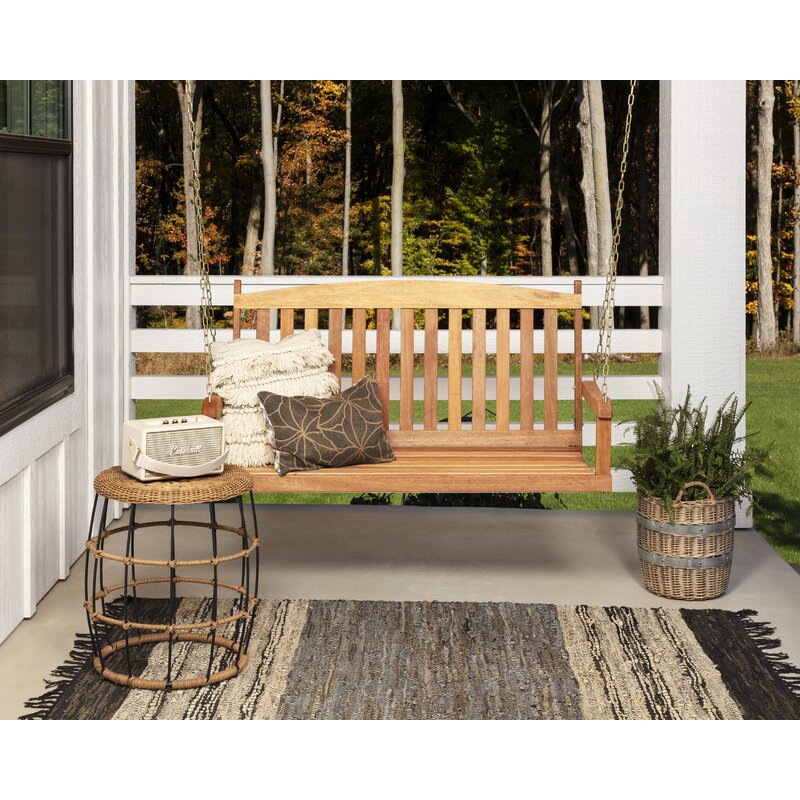 Zain Hardwood Porch Swing // More Porch Swings
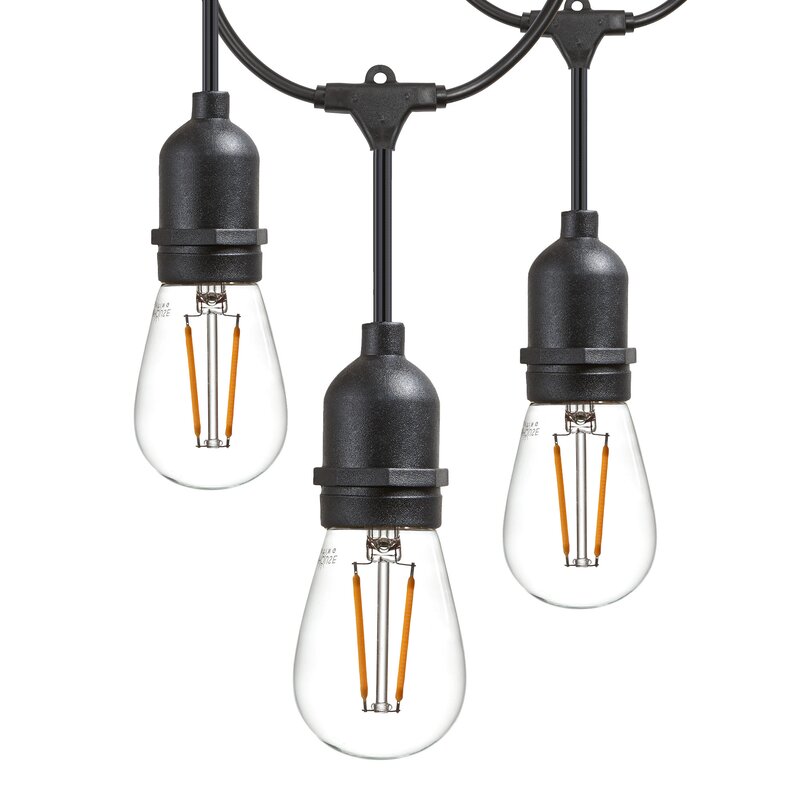 Outdoor Blub String Lights // More String Lights
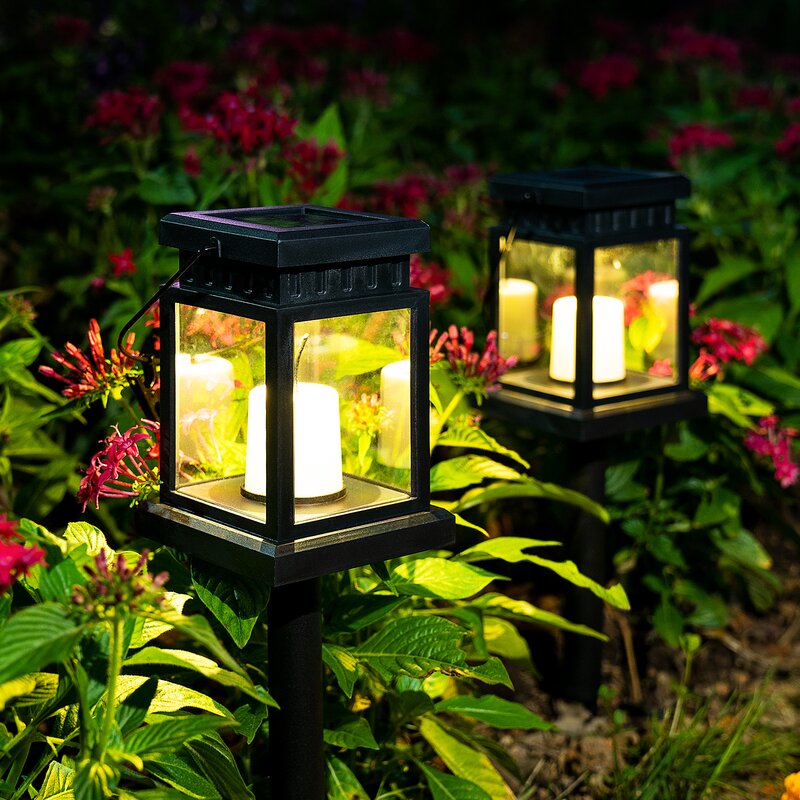 Pathway Light Pack // More Landscape Lighting
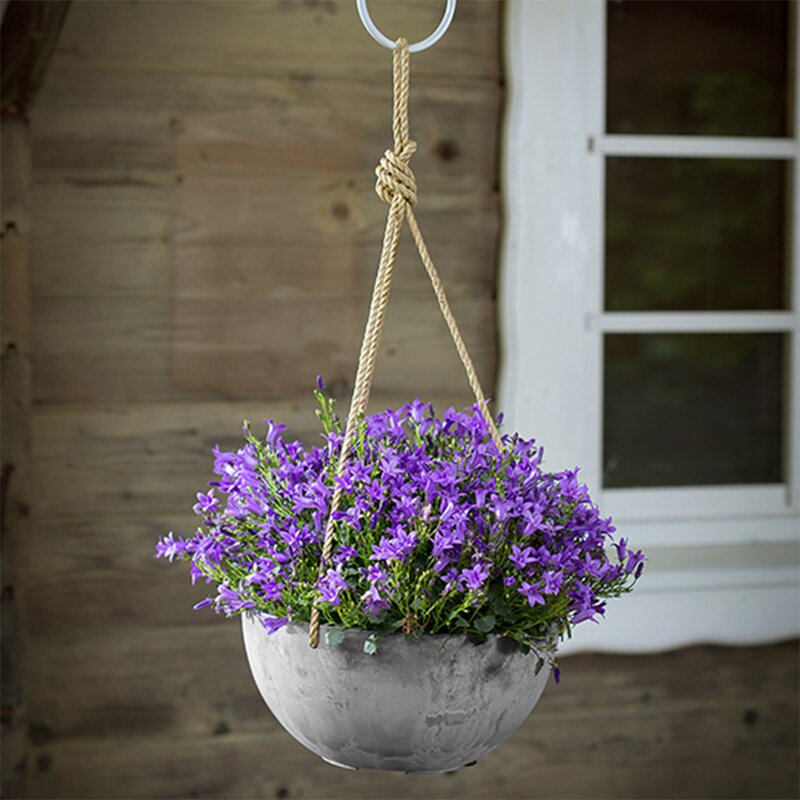 Self-Watering Hanging Planter // More Planters
This comment has been removed by a blog administrator.
ReplyDelete