In every home, I feel like the owner's bedroom is always the most neglected because let's face it, no one really sees that room except you. BUT, hello, we see it literally every day, so shouldn't we love our own space?! Exactly one year after I finished tiling our kitchen and our hall bathroom, I decided I needed to do just one last tiling project in our home--our bathroom!
Check out my past tiling projects below //
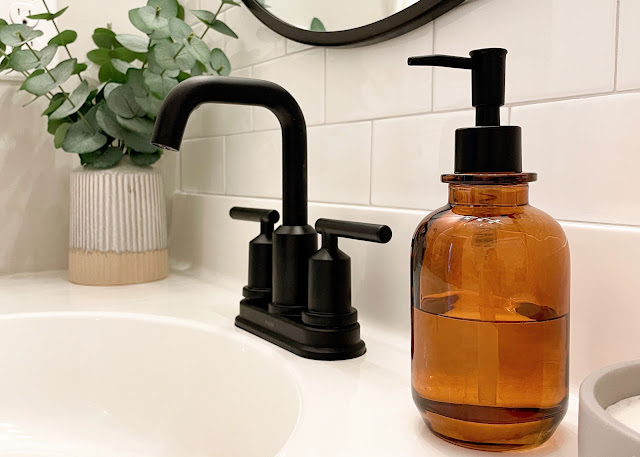
I know there have been talks that subway tile is on its way out, but newsflash, it's classic, and it will never go out. It has been a classic style for over 100 years. Besides, it matches the rest of my house, so I went with a similar style that we did in our hall bathroom, and toned it down a bit in order to make it more spa-like for our own personal retreat. I was able to save a little money on this room's refresh because I pulled a lot of the same decor from our hall bathroom into our bathroom. We couldn't find anything else that we liked to represent our personal style better than we already achieved in the hall bath, so much so that we bought the same exact shower curtain. haha! That was our sign to move everything into our bathroom and give the hall bathroom a refresh just for Bentley!
For this project, we went with the same grout color as our kitchen. We love, love the dark grout in our hall bathroom, but oh my gosh is it the absolute worst to work with, and it is far less forgiving when you're not a professional tiler. Except, I've tiled three rooms so far, so y'all think I can be a pro-tiler now?! Whose house am I going to first?! haha!
Okay, I've made you wait long enough...here's the BEFORE.


I seriously can't believe we were okay with our bathroom looking like this for the past two years. Get ready for the tiling process. I'll share a few tips & tricks throughout the process, too!


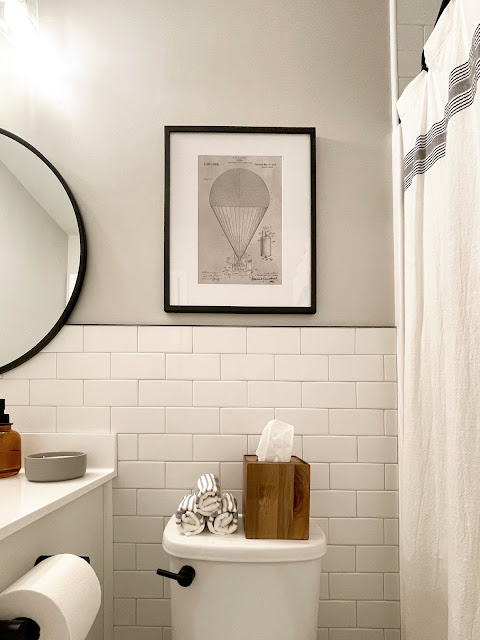
For the first time in my DIY career, our vanity countertop was level. Because it was level, I based my tiled wall off of the countertop backsplash that's attached. I tiled 4 tiles up just like I did in the hall bathroom to keep them cohesive. As you're doing the last row of tiles on the top, you'll want to finish it off with a tile edging trim. I opted for black so that it would match our fixtures and match the hall bathroom.
Pro Tip: When tiling behind the toilet, be sure to apply your tile adhesive to each tile vs the wall.
The easiest way to tile behind the toilet is to remove the tank. There's minimal mess and it's super easy to reattach. This is also where one of two tricky tile cuts came into play. I had to use my wet saw to cut out a notch in one of the tiles in order for it to fit in line with the vanity backsplash and fit under it as well. Once I got that one cut out of the way, it was smooth sailing on down behind the toilet. At the base of the toilet, there is a slight gap between the bottom tile and the baseboard, but I'd rather have a slight gap that I paint white than cutting tiny slivers of tile. I did tiny slivers of tile in the hall bathroom, and it was so much work for not a lot of reward. Plus, it's down so low behind the toilet and trash can that literally no one ever sees it.


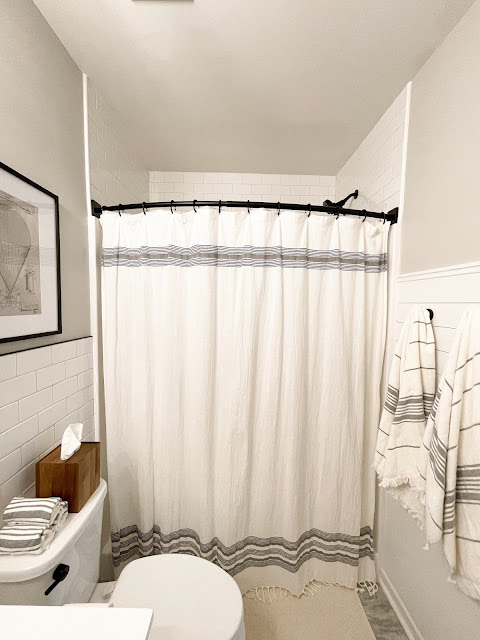
Up next: Tiling above the shower surround. I went back and forth between tiling above the surround or leaving it the drywall. In the end, I am so glad that I decided to tile it. I never realized how wet the wall was getting from the shower and steam, so tiling the wall has not only made the space beautiful, it is serving as a wall protectant as well.
Pro Tip: Find the center of the wall and draw a line going up the wall. You'll be able to line the edges of the tile to the line or mark the center of the tile with a permanent marker and line that up to your wall line.
One thing above the shower surround that I did not get so lucky with was the leveling. It was off by almost half an inch in some places. The left side dipped lower, so I placed the right side tiles first so that I could create a level line. I started the right side tiles in the exact center of the wall because I wanted a full tile to be at the bottom center and tile from there.
I found it best to have a slight gap between the bottom tile and the shower surround in order to create a level line and a less noticeable gap going across. I checked the level of the tiles every couple of tiles so that the tile adhesive would still be movable in case it was off for some reason. As I made my way to the right side of the shower, I was able to maintain a level line with minimal gaps. Once I got to the far side, it was time for a piece of tile edging. I used a white bullnose for the sides of the shower in our bathroom--mainly because I had them on hand from our last tiling project, so it kept us below budget!
Pro Tip: Use painter's tape to help keep the tile edging in place until the tile adhesive fully dries.
The only annoying cuts I had to make above the shower surround was a rounded cut so that the tile could fit perfectly around the showerhead, and then the bottom left row. All of the bottom left row needed to be trimmed ever-so-slightly to keep the tiles level going around. Keep in mind that trimming a tile 1/4 to a 1/2 inch won't be noticeable, but uneven grout lines will. Always, always keep your grout lines level.


I kept checking the level as I went across again, and this is when I noticed I was going to have about a 1/4 inch to 1/2 inch gap at the top as well since the bottom was so unlevel. I recently discovered a foam backer rod that I was able to cut to size to help fill in that gap. This allowed me to be able to caulk right over it, and boom, problem solved, and no one will ever know...except all of you reading this. So, shh! Don't tell anyone else my secret. In the photo above, you can see the gap before it was filled in. It's totally noticeable when you can see the gray paint above, but once it's filled in white, you can't even tell.


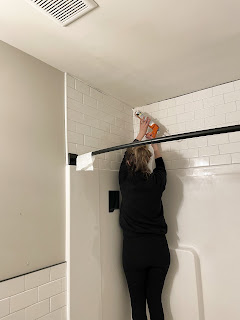
Once all of the tiles have had a couple of hours to dry in place, it's time to grout! Chris helped me tape off the ceiling since I was just ever-so-slightly too short to reach, and then I was on my crazy merry way. There's something so intense about grouting. Do you ever need an adrenaline rush? Grout some tile. You have to get grout into every bit of the tile grout lines, attempt to not make a complete mess, and grout the wall (and in my case, walls!) all before the grout seizes and is completely useless.
Chris came in to help me with the sponging process since it's such a meticulous part of the process. I wanted to make sure both of us were keeping an eye on perfecting the grout lines, filling in any missing grout gaps, and he also helped get the top rows sponged for me since I could barely reach them. Thankfully my parents were in town while we did this project, so Bentley was downstairs with them while we grouted!
Pro Tip: Purchase the matching grout caulk so you can fix any gaps or perfect a grout line. This came in handy to caulk between the top of the shower surround and bottom tile, in the gap between the tile edging, and in fixing bubble holes after the grout had dried.


I also wanted to mention one other DIY expert call out. I'm not a tiling expert by any means, but I know when a wall is unlevel and there's no way that I'll be able to fix something. As I was tiling down the vanity cabinet, I knew that creating a perfect line was going to be impossible for one reason only. The freakin' wall is crooked.
If I wanted to fill in the tiny gap of tiles, I would have had to trim a tile to less than 1/4 inch, and quite frankly, that's just not safe on a wet saw nor did I want to go through all of that trouble. I picked up a white primed and painted trim piece from our local hardware store and secured it in place with humidity-resistant Gorilla Glue and bam, gap is gone and the side of the cabinet looks perfectly finished.
The last part of any DIY project is caulking seams. I caulked along the sides of the tile edging to close the gap between the wall and of course at the ceiling. I didn't get a picture of the foam that I put in the gap at the top, but that is what the gray line is that I'm caulking. Also, remember caulk is flexible, so as the caulk fully dries, it may shrink a bit. For me, I have to go back once more to recaulk the top line in a few weeks. This also happened in our kitchen, and with one last simple swipe of caulk, it's perfect again. Homes shift, materials shrink and expand, and I think that's not talked about enough. If you see gaps in between caulk lines or woodwork, it's not always due to poor workmanship...it's just a part of being a homeowner.
Now that I've shown you my third tiling process...it's time for the reveal!
Drum roll, please...
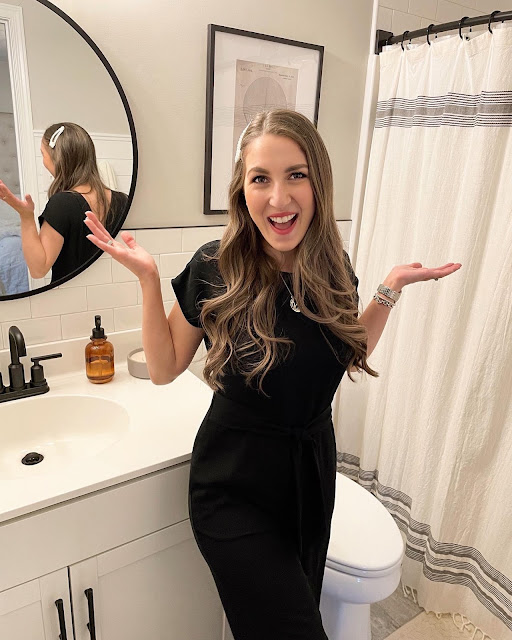
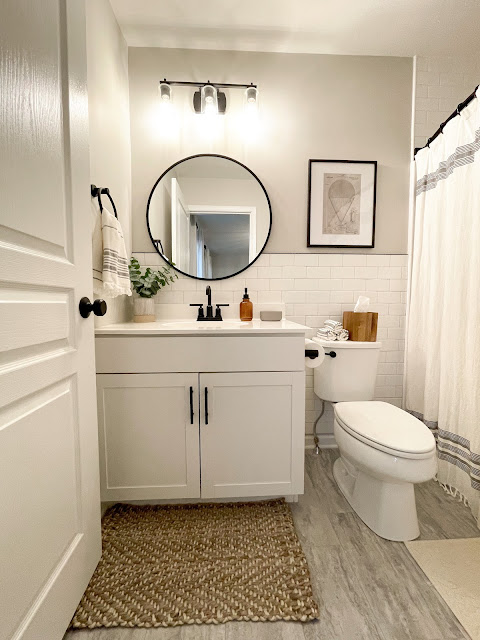
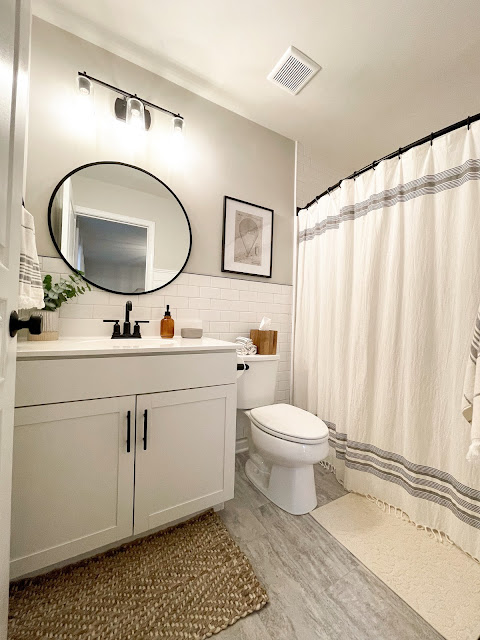

What do you think?!
Not too shabby for a two-day project and we are obsessed with our new bathroom. This just goes to show that you can make a huge impact on your space with a weekend and around $200!
Shop My Post!
Tiling Essentials

Bathroom Decor
Home Updates

what color paint did you use
ReplyDeleteIt's Sherwin-Williams Agreeable Gray!
DeleteI'm remodeling with tile surround and going to tile above and to chair rail as well. Looks great.
ReplyDeleteIt will look gorgeous-- thank you!!
DeleteI love your “before” shower curtain!
ReplyDeleteAny idea where I can buy one?
It was from Target! :)
Delete
ReplyDeleteI completely agree with you! Our bedroom might be private, but it's where we start and end each day—so why not make it a space we love? Your commitment to improving different areas of your home is admirable. I'm intrigued to hear more about your bathroom tiling project and the impact it had on your space
Hi, love the look! We are in the process of the same project. However I was told you absolutely cannot tile over drywall. Did you not replace the drywall with a cement board? Thanks!
ReplyDeleteThank you so much! I just tiled right on the drywall! This was my third time doing it :) I did it in my hall bathroom and in my kitchen as well.
Delete